Tabletop Demo Quickstart Guide
Tabletop Demo software enables demonstration of Digital Lumens fixture and DLA control module functionality, including the active and inactive illumination levels, as well as the occupancy sensor delay settings. Additionally, Tabletop Demo enables demonstration of the daylight harvesting feature.
To run Tabletop demo, open Commissioner and select Help > Switch to Tabletop Demo. See Starting Commissioner for more information.
Using Tabletop Demo Tool
Connect the fixture or DLA device to an appropriate power source.
Note: The DLE standard-voltage fixture can be plugged into most standard outlets. The high-voltage fixture version requires a 277-480V AC source.
Note: ILE fixtures cannot be plugged into most standard outlets. Use a step-up transformer to provide power to an ILE fixture.
- Connect the Telegesis USB wireless adapter to your computer and launch Tabletop Demo.
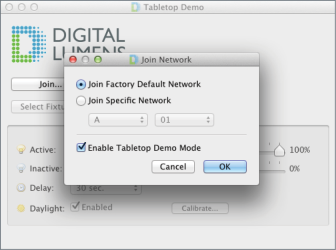
- Click Join and select a network:
- Check Enable Tabletop Demo Mode and then click OK.
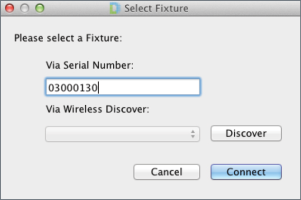
- In the application window, click Select Fixture. Connect to a device using either of the following methods:
- Enter the serial number of the device you are demonstrating.
- To connect wirelessly, click Discover. Then, select the correct device from the drop-down list.
- Click Connect.
Note: If the application does not discover the device, click Discover again or enter the serial number manually.
Manual Dimming Adjustment
Click Manual.
Automatic Adjustment - General Functions
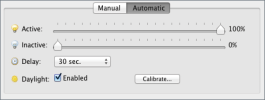
Move the sliders to adjust the active, inactive, and motion sensor delay settings. Demonstrate these functions by activating the motion sensor and pointing out the active light output, as well as the inactive light output, that occurs after the designated motion sensor delay time.
Note: By default, the inactive dimming level is 10.
Automatic Adjustment - Daylight Harvesting
To demonstrate daylight harvesting, you must calibrate the function before each demonstration:
- Position the device as it will remain for the demonstration. This is critical for accurate calibration.
- Click Calibrate. The light’s behavior will change as it activates its ambient light sensor.
- If not already selected, check Enabled.
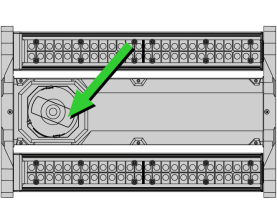
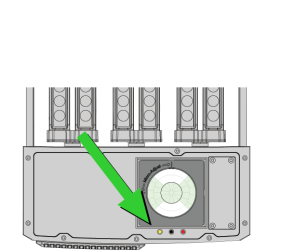
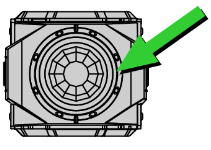
- Using a flashlight or any directional light source, shine light at the daylight sensor (see arrows, below).
|
|
|
As you are shining the light at the sensor, notice the fixture slowly decreasing its output to accommodate the additional light source. When you remove the flashlight notice the fixture increase its output to its active level settings.
